[김영한 스프링] 02. 데이터 접근 기술 프로젝트 구조 설명
프로젝트 구조 설명1 - 기본
build.gradle
plugins {
	id 'org.springframework.boot' version '2.6.5'
	id 'io.spring.dependency-management' version '1.0.11.RELEASE'
	id 'java'
}

group = 'com.example'
version = '0.0.1-SNAPSHOT'
sourceCompatibility = '11'

configurations {
	compileOnly {
		extendsFrom annotationProcessor
	}
}

repositories {
	mavenCentral()
}

dependencies {
	implementation 'org.springframework.boot:spring-boot-starter-thymeleaf'
	implementation 'org.springframework.boot:spring-boot-starter-web'
	compileOnly 'org.projectlombok:lombok'
	annotationProcessor 'org.projectlombok:lombok'
	testImplementation 'org.springframework.boot:spring-boot-starter-test'

	//테스트에서 lombok 사용
	testCompileOnly 'org.projectlombok:lombok'
	testAnnotationProcessor 'org.projectlombok:lombok'
}

tasks.named('test') {
	useJUnitPlatform()
}
Item
package hello.itemservice.domain;

import lombok.Data;

@Data
public class Item {

    private Long id;

    private String itemName;
    private Integer price;
    private Integer quantity;

    public Item() {
    }

    public Item(String itemName, Integer price, Integer quantity) {
        this.itemName = itemName;
        this.price = price;
        this.quantity = quantity;
    }
}- Item은 상품 자체를 나타내는 객체이다. 이름, 가격, 수량을 속성으로 가지고 있다.
ItemRepository 인터페이스
package hello.itemservice.repository;

import hello.itemservice.domain.Item;

import java.util.List;
import java.util.Optional;

public interface ItemRepository {

    Item save(Item item);

    void update(Long itemId, ItemUpdateDto updateParam);

    Optional<Item> findById(Long id);

    List<Item> findAll(ItemSearchCond cond);

}- 메모리 구현체에서 향후 다양한 데이터 접근 기술 구현체로 손쉽게 변경하기 위해 리포지토리에 인터페이스를 도입했다.
- 각각의 기능은 메서드 이름으로 충분히 이해가 될 것이다.
ItemSearchCond
package hello.itemservice.repository;

import lombok.Data;

@Data
public class ItemSearchCond {

    private String itemName;
    private Integer maxPrice;

    public ItemSearchCond() {
    }

    public ItemSearchCond(String itemName, Integer maxPrice) {
        this.itemName = itemName;
        this.maxPrice = maxPrice;
    }
}- 검색 조건으로 사용된다. 상품명, 최대 가격이 있다. 참고로 상품명의 일부만 포함되어도 검색이 가능해야 한다. (like 검색)
- cond condition을 줄여서 사용했다.
- 이 프로젝트에서 검색 조건은 뒤에 Cond를 붙이도록 규칙을 정했다.
ItemUpdateDto
package hello.itemservice.repository;

import lombok.Data;

@Data
public class ItemUpdateDto {
    private String itemName;
    private Integer price;
    private Integer quantity;

    public ItemUpdateDto() {
    }

    public ItemUpdateDto(String itemName, Integer price, Integer quantity) {
        this.itemName = itemName;
        this.price = price;
        this.quantity = quantity;
    }
}- 상품을 수정할 때 사용하는 객체이다.
- 단순히 데이터를 전달하는 용도로 사용되므로 DTO를 뒤에 붙였다.
DTO(data transfer object)
- 데이터 전송 객체
- DTO는 기능은 없고 데이터를 전달만 하는 용도로 사용되는 객체를 뜻한다.
- 참고로 DTO에 기능이 있으면 안 되는가? 그것은 아니다. 객체의 주목적이 데이터를 전송하는 것이라면 DTO라 할 수 있다.
- 객체 이름에 DTO를 꼭 붙여야 하는 것은 아니다. 대신 붙여두면 용도를 알 수 있다는 장점은 있다.
- 이전에 설명한 ItemSearchCond도 DTO 역할을 하지만, 이 프로젝트에서 Cond는 검색 조건으로 사용한다는 규칙을 정했다. 따라서 DTO를 붙이지 않아도 된다. ItemSearchCondDto 이렇게 하면 너무 복잡해진다. 그리고 Cond라는 것만 봐도 용도를 알 수 있다.
- 참고로 이런 규칙은 정해진 것이 없기 때문에 해당 프로젝트 안에서 일관성 있게 규칙을 정하면 된다.
MemoryItemRepository
package hello.itemservice.repository.memory;

import hello.itemservice.domain.Item;
import hello.itemservice.repository.ItemRepository;
import hello.itemservice.repository.ItemSearchCond;
import hello.itemservice.repository.ItemUpdateDto;
import org.springframework.stereotype.Repository;
import org.springframework.util.ObjectUtils;

import java.util.*;
import java.util.stream.Collectors;

@Repository
public class MemoryItemRepository implements ItemRepository {

    private static final Map<Long, Item> store = new HashMap<>(); //static
    private static long sequence = 0L; //static

    @Override
    public Item save(Item item) {
        item.setId(++sequence);
        store.put(item.getId(), item);
        return item;
    }

    @Override
    public void update(Long itemId, ItemUpdateDto updateParam) {
        Item findItem = findById(itemId).orElseThrow();
        findItem.setItemName(updateParam.getItemName());
        findItem.setPrice(updateParam.getPrice());
        findItem.setQuantity(updateParam.getQuantity());
    }

    @Override
    public Optional<Item> findById(Long id) {
        return Optional.ofNullable(store.get(id));
    }

    @Override
    public List<Item> findAll(ItemSearchCond cond) {
        String itemName = cond.getItemName();
        Integer maxPrice = cond.getMaxPrice();
        return store.values().stream()
                .filter(item -> {
                    if (ObjectUtils.isEmpty(itemName)) {
                        return true;
                    }
                    return item.getItemName().contains(itemName);
                }).filter(item -> {
                    if (maxPrice == null) {
                        return true;
                    }
                    return item.getPrice() <= maxPrice;
                })
                .collect(Collectors.toList());
    }

    public void clearStore() {
        store.clear();
    }

}- ItemRepository 인터페이스를 구현한 메모리 저장소이다.
- 메모리이기 때문에 자바를 다시 실행하면 기존에 저장된 데이터가 모두 사라진다.
- save, update, findById는 쉽게 이해할 수 있을 것이다. 참고로 findById는 Optional을 반환해야 하기 때문에 Optional.ofNullable을 사용했다.
- findAll은 ItemSearchCond이라는 검색 조건을 받아서 내부에서 데이터를 검색하는 기능을 한다. 데이터 베이스로 보면 where 구문을 사용해서 필요한 데이터를 필터링하는 과정을 거치는 것이다.
- 여기서 자바 스트림을 사용한다.
- itemName이나, maxPrice가 null이거나 비었으면 해당 조건을 무시한다.
- itemName이나, maxPrice에 값이 있을 때만 해당 조건으로 필터링 기능을 수행한다.
- clearStore() 메모리에 저장된 Item을 모두 삭제해서 초기화한다. 테스트 용도로만 사용한다.
ItemService 인터페이스
package hello.itemservice.service;

import hello.itemservice.domain.Item;
import hello.itemservice.repository.ItemSearchCond;
import hello.itemservice.repository.ItemUpdateDto;

import java.util.List;
import java.util.Optional;

public interface ItemService {

    Item save(Item item);

    void update(Long itemId, ItemUpdateDto updateParam);

    Optional<Item> findById(Long id);

    List<Item> findItems(ItemSearchCond itemSearch);
}- 서비스의 구현체를 쉽게 변경하기 위해 인터페이스를 사용했다.
- 참고로 서비스는 구현체를 변경할 일이 많지는 않기 때문에 사실 서비스에 인터페이스를 잘 도입하지는 않는다.
- 여기서는 예제 설명 과정에서 구현체를 변경할 예정이어서 인터페이스를 도입했다.
ItemServiceV1
package hello.itemservice.service;

import hello.itemservice.domain.Item;
import hello.itemservice.repository.ItemRepository;
import hello.itemservice.repository.ItemSearchCond;
import hello.itemservice.repository.ItemUpdateDto;
import lombok.RequiredArgsConstructor;
import org.springframework.stereotype.Service;

import java.util.List;
import java.util.Optional;

@Service
@RequiredArgsConstructor
public class ItemServiceV1 implements ItemService {

    private final ItemRepository itemRepository;

    @Override
    public Item save(Item item) {
        return itemRepository.save(item);
    }

    @Override
    public void update(Long itemId, ItemUpdateDto updateParam) {
        itemRepository.update(itemId, updateParam);
    }

    @Override
    public Optional<Item> findById(Long id) {
        return itemRepository.findById(id);
    }

    @Override
    public List<Item> findItems(ItemSearchCond cond) {
        return itemRepository.findAll(cond);
    }
}- ItemServiceV1 서비스 구현체는 대부분의 기능을 단순히 리포지토리에 위임한다.
HomeController
package hello.itemservice.web;

import lombok.RequiredArgsConstructor;
import org.springframework.stereotype.Controller;
import org.springframework.web.bind.annotation.RequestMapping;

@Controller
@RequiredArgsConstructor
public class HomeController {

    @RequestMapping("/")
    public String home() {
        return "redirect:/items";
    }
}- 단순히 홈으로 요청이 왔을 때 items로 이동하는 컨트롤러이다.
ItemController
package hello.itemservice.web;

import hello.itemservice.domain.Item;
import hello.itemservice.repository.ItemSearchCond;
import hello.itemservice.repository.ItemUpdateDto;
import hello.itemservice.service.ItemService;
import lombok.RequiredArgsConstructor;
import org.springframework.stereotype.Controller;
import org.springframework.ui.Model;
import org.springframework.web.bind.annotation.*;
import org.springframework.web.servlet.mvc.support.RedirectAttributes;

import java.util.List;

@Controller
@RequestMapping("/items")
@RequiredArgsConstructor
public class ItemController {

    private final ItemService itemService;

    @GetMapping
    public String items(@ModelAttribute("itemSearch") ItemSearchCond itemSearch, Model model) {
        List<Item> items = itemService.findItems(itemSearch);
        model.addAttribute("items", items);
        return "items";
    }

    @GetMapping("/{itemId}")
    public String item(@PathVariable long itemId, Model model) {
        Item item = itemService.findById(itemId).get();
        model.addAttribute("item", item);
        return "item";
    }

    @GetMapping("/add")
    public String addForm() {
        return "addForm";
    }

    @PostMapping("/add")
    public String addItem(@ModelAttribute Item item, RedirectAttributes redirectAttributes) {
        Item savedItem = itemService.save(item);
        redirectAttributes.addAttribute("itemId", savedItem.getId());
        redirectAttributes.addAttribute("status", true);
        return "redirect:/items/{itemId}";
    }

    @GetMapping("/{itemId}/edit")
    public String editForm(@PathVariable Long itemId, Model model) {
        Item item = itemService.findById(itemId).get();
        model.addAttribute("item", item);
        return "editForm";
    }

    @PostMapping("/{itemId}/edit")
    public String edit(@PathVariable Long itemId, @ModelAttribute ItemUpdateDto updateParam) {
        itemService.update(itemId, updateParam);
        return "redirect:/items/{itemId}";
    }

}- 상품을 CRUD하는 컨트롤러이다. 자세한 내용은 MVC1편을 참고하자.
- 화면을 출력하기 위한 리소스(css, html, templates)는 MVC1편을 참고하자.
프로젝트 구조 설명2 - 설정
MemoryConfig
package hello.itemservice.config;

import hello.itemservice.repository.ItemRepository;
import hello.itemservice.repository.memory.MemoryItemRepository;
import hello.itemservice.service.ItemService;
import hello.itemservice.service.ItemServiceV1;
import org.springframework.context.annotation.Bean;
import org.springframework.context.annotation.Configuration;

@Configuration
public class MemoryConfig {

    @Bean
    public ItemService itemService() {
        return new ItemServiceV1(itemRepository());
    }

    @Bean
    public ItemRepository itemRepository() {
        return new MemoryItemRepository();
    }

}- ItemServiceV1, MemoryItemRepository를 스프링 빈으로 등록하고 생성자를 통해 의존관계를 주입한다.
- 참고로 여기서는 서비스와 리포지토리는 구현체를 편리하게 변경하기 위해, 이렇게 수동으로 빈을 등록했다.
- 컨트롤러는 컴포넌트 스캔을 사용한다.
TestDataInit
package hello.itemservice;

import hello.itemservice.domain.Item;
import hello.itemservice.repository.ItemRepository;
import lombok.RequiredArgsConstructor;
import lombok.extern.slf4j.Slf4j;
import org.springframework.boot.context.event.ApplicationReadyEvent;
import org.springframework.context.event.EventListener;

@Slf4j
@RequiredArgsConstructor
public class TestDataInit {

    private final ItemRepository itemRepository;

    /**
     * 확인용 초기 데이터 추가
     */
    @EventListener(ApplicationReadyEvent.class)
    public void initData() {
        log.info("test data init");
        itemRepository.save(new Item("itemA", 10000, 10));
        itemRepository.save(new Item("itemB", 20000, 20));
    }

}- 애플리케이션을 실행할 때 초기 데이터를 저장한다.
- 리스트에서 데이터가 잘 나오는지 편리하게 확인할 용도로 사용한다.
- 이 기능이 없으면 서버를 실행할 때마다 데이터를 입력해야 리스트에 나타난다. (메모리여서 서버를 내리면 데이터가 제거된다.)
- @EventListener(ApplicationReadyEvent.class) : 스프링 컨테이너가 완전히 초기화를 다 끝내고, 실행 준비가 되었을 때 발생하는 이벤트이다. 스프링이 이 시점에 해당 애노테이션이 붙은 initData() 메서드를 호출해 준다.
- 참고로 이 기능 대신 @PostConstruct를 사용할 경우 AOP 같은 부분이 아직 다 처리되지 않은 시점에 호출될 수 있기 때문에, 간혹 문제가 발생할 수 있다. 예를 들어서 @Transactional과 관련된 AOP가 적용되지 않은 상태로 호출될 수 있다.
- @EventListener(ApplicationReadyEvent.class)는 AOP를 포함한 스프링 컨테이너가 완전히 초기화된 이후에 호출되기 때문에 이런 문제가 발생하지 않는다.
ItemServiceApplication
package hello.itemservice;

import hello.itemservice.config.*;
import hello.itemservice.repository.ItemRepository;
import org.springframework.boot.SpringApplication;
import org.springframework.boot.autoconfigure.SpringBootApplication;
import org.springframework.context.annotation.Bean;
import org.springframework.context.annotation.Import;
import org.springframework.context.annotation.Profile;


@Import(MemoryConfig.class)
@SpringBootApplication(scanBasePackages = "hello.itemservice.web")
public class ItemServiceApplication {

	public static void main(String[] args) {
		SpringApplication.run(ItemServiceApplication.class, args);
	}

	@Bean
	@Profile("local")
	public TestDataInit testDataInit(ItemRepository itemRepository) {
		return new TestDataInit(itemRepository);
	}

}- @Import(MemoryConfig.class) : 앞서 설정한 MemoryConfig를 설정 파일로 사용한다.
- scanBasePackages = "hello.itemservice.web" : 여기서는 컨트롤러만 컴포넌트 스캔을 사용하고, 나머지는 직접 수동 등록한다. 그래서 컴포넌트 스캔 경로를 hello.itemservice.web 하위로 지정했다.
- @Profile("local") : 특정 프로필의 경우에만 해당 스프링 빈을 등록한다. 여기서는 local이라는 이름의 프로필이 사용되는 경우에만 testDataInit이라는 스프링 빈을 등록한다. 이 빈은 앞서 본 것인데, 편의상 초기 데이터를 만들어서 저장하는 빈이다.
프로필
스프링은 로딩 시점에 application.properties의 spring.profiles.active 속성을 읽어서 프로필로 사용한다.
이 프로필은 로컬(나의 PC), 운영 환경, 테스트 실행 등등 다양한 환경에 따라서 다른 설정을 할 때 사용하는 정보이다.
예를 들어서 로컬PC에서는 로컬 PC에 설치된 데이터베이스에 접근해야 하고, 운영 환경에서는 운영 데이터베이스에 접근해야 한다면 서로 설정 정보가 달라야 한다. 심지어 환경에 따라서 다른 스프링 빈을 등록해야 할 수 도 있다. 프로필을 사용하면 이런 문제를 깔끔하게 해결할 수 있다.
application.properties
main 프로필
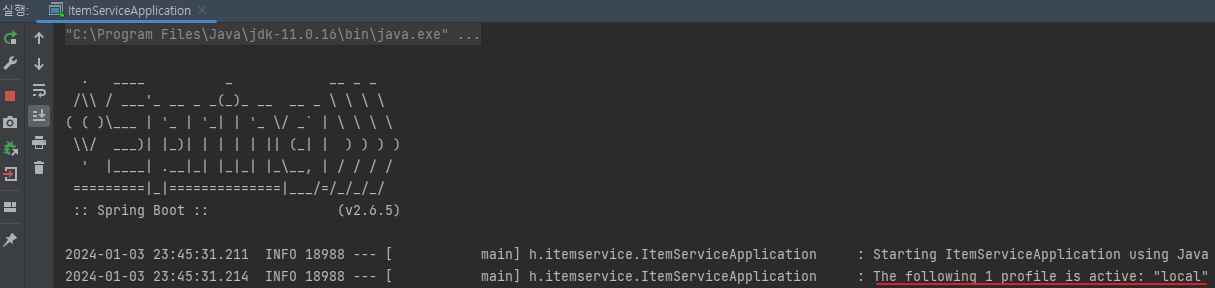
spring.profiles.active=local- 이 위치의 application.properties는 /src/main 하위의 자바 객체를 실행할 때 (주로 main()) 동작하는 스프링 설정이다. spring.profiles.active=local이라고 하면 스프링은 local이라는 프로필로 동작한다. 따라서 직전에 설명한 @Profile("local")가 동작하고, testDataInit가 스프링 빈으로 등록된다.
참고로 프로필을 지정하지 않으면 디폴트(default) 프로필이 실행된다.
No active profile set, falling back to 1 default profile: "default"
test 프로필
spring.profiles.active=test- 이 위치의 application.properties는 /src/test 하위의 자바 객체를 실행할 때 동작하는 스프링 설정이다.
- 주로 테스트 케이스를 실행할 때 동작한다.
- spring.profiles.active=test로 설정하면 스프링은 test라는 프로필로 동작한다. 이 경우 직전에 설명한 @Profile("local")는 프로필 정보가 맞지 않아서 동작하지 않는다. 따라서 testDataInit이라는 스프링 빈도 등록되지 않고, 초기 데이터도 추가하지 않는다

- 프로필 기능을 사용해서 스프링으로 웹 애플리케이션을 로컬(local)에서 직접 실행할 때는 testDataInit이 스프링 빈으로 등록된다. 따라서 등록한 초기화 데이터를 편리하게 확인할 수 있다.
- 초기화 데이터 덕분에 편리한 점도 있지만, 테스트 케이스를 실행할 때는 문제가 될 수 있다. 테스트에서 이런 데이터가 들어있다면 오류가 발생할 수 있다. 예를 들어서 데이터를 하나 저장하고 전체 카운트를 확인하는데 1이 아니라 testDataInit 때문에 데이터가 2건 추가되어서 3이 되는 것이다.
- 프로필 기능 덕분에 테스트 케이스에서는 test 프로필이 실행된다. 따라서 TestDataInit는 스프링 빈으로 추가되지 않고, 따라서 초기 데이터도 추가되지 않는다.
참고
프로필에 대한 스프링 부트 공식 메뉴얼은 다음을 참고하자
https://docs.spring.io/spring-boot/docs/current/reference/html/features.html#features.profiles
프로젝트 구조 설명3 - 테스트
ItemRepositoryTest
package hello.itemservice.domain;

import hello.itemservice.repository.ItemRepository;
import hello.itemservice.repository.ItemSearchCond;
import hello.itemservice.repository.ItemUpdateDto;
import hello.itemservice.repository.memory.MemoryItemRepository;
import org.junit.jupiter.api.AfterEach;
import org.junit.jupiter.api.Test;
import org.springframework.beans.factory.annotation.Autowired;
import org.springframework.boot.test.context.SpringBootTest;

import java.util.List;

import static org.assertj.core.api.Assertions.assertThat;

@SpringBootTest
class ItemRepositoryTest {

    @Autowired
    ItemRepository itemRepository;

    @AfterEach
    void afterEach() {
        //MemoryItemRepository 의 경우 제한적으로 사용
        if (itemRepository instanceof MemoryItemRepository) {
            ((MemoryItemRepository) itemRepository).clearStore();
        }
    }

    @Test
    void save() {
        //given
        Item item = new Item("itemA", 10000, 10);

        //when
        Item savedItem = itemRepository.save(item);

        //then
        Item findItem = itemRepository.findById(item.getId()).get();
        assertThat(findItem).isEqualTo(savedItem);
    }

    @Test
    void updateItem() {
        //given
        Item item = new Item("item1", 10000, 10);
        Item savedItem = itemRepository.save(item);
        Long itemId = savedItem.getId();

        //when
        ItemUpdateDto updateParam = new ItemUpdateDto("item2", 20000, 30);
        itemRepository.update(itemId, updateParam);

        //then
        Item findItem = itemRepository.findById(itemId).get();
        assertThat(findItem.getItemName()).isEqualTo(updateParam.getItemName());
        assertThat(findItem.getPrice()).isEqualTo(updateParam.getPrice());
        assertThat(findItem.getQuantity()).isEqualTo(updateParam.getQuantity());
    }

    @Test
    void findItems() {
        //given
        Item item1 = new Item("itemA-1", 10000, 10);
        Item item2 = new Item("itemA-2", 20000, 20);
        Item item3 = new Item("itemB-1", 30000, 30);

        itemRepository.save(item1);
        itemRepository.save(item2);
        itemRepository.save(item3);

        //둘 다 없음 검증
        test(null, null, item1, item2, item3);
        test("", null, item1, item2, item3);

        //itemName 검증
        test("itemA", null, item1, item2);
        test("temA", null, item1, item2);
        test("itemB", null, item3);

        //maxPrice 검증
        test(null, 10000, item1);

        //둘 다 있음 검증
        test("itemA", 10000, item1);
    }

    void test(String itemName, Integer maxPrice, Item... items) {
        List<Item> result = itemRepository.findAll(new ItemSearchCond(itemName, maxPrice));
        assertThat(result).containsExactly(items);
    }
}- afterEach() : 테스트는 서로 영향을 주면 안 된다. 따라서 각각의 테스트가 끝나고 나면 저장한 데이터를 제거해야 한다. @AfterEach는 각각의 테스트의 실행이 끝나는 시점에 호출된다. 여기서는 메모리 저장소를 완전히 삭제해서 다음 테스트에 영향을 주지 않도록 초기화한다.
- 인터페이스에는 clearStore()가 없기 때문에 MemoryItemRepository인 경우에만 다운 케스팅을 해서 데이터를 초기화한다. 뒤에서 학습하겠지만, 실제 DB를 사용하는 경우에는 테스트가 끝난 후에 트랜잭션을 롤백해서 데이터를 초기화할 수 있다.
- save()
- 상품을 하나 저장하고 잘 저장되었는지 검증한다.
- updateItem()
- 상품을 하나 수정하고 잘 수정되었는지 검증한다.
- findItems()
- 상품을 찾는 테스트이다.
- 상품명과 상품 가격 조건을 다양하게 비교하는 것을 확인할 수 있다.
- 문자의 경우 null 조건도 있지만, 빈 문자("")의 경우에도 잘 동작하는지 검증한다.
- 상품을 찾는 테스트이다.
출처 : https://www.inflearn.com/course/%EC%8A%A4%ED%94%84%EB%A7%81-db-2/dashboard
스프링 DB 2편 - 데이터 접근 활용 기술 강의 - 인프런
백엔드 개발에 필요한 DB 데이터 접근 기술을 활용하고, 완성할 수 있습니다. 스프링 DB 접근 기술의 원리와 구조를 이해하고, 더 깊이있는 백엔드 개발자로 성장할 수 있습니다., 백엔드 개발자
www.inflearn.com